I've been pretty excited for this module from even before I started it. If theres anything I really wanted to get better at, it was my 3D, but I was too scared and now I'm not sure why. It wasn't laziness, but I was very intimidated by 3D. I never really got the hang of it, and there is no "ok" with 3D; I only ever see amazingly good or amazingly bad.
But putting these negetive thoughts aside, I've still finished my PDP and modelled 2 characters I'm proud of. Before I start critically analyzing them, I want to show a model I did back in 2nd year, and why I'm happy I've accepted "I can do better in 3D!" for myself...:) Don't laugh, though:
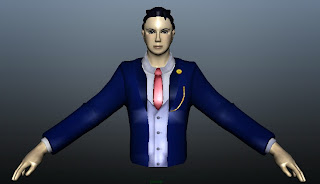
Before I start reflecting, I want to remind you of my objective; to model existing character designs into 3D, polished and ready to be placed in a game. My one goal was to not alter the design to make it suit me better. As a character concept artist, it was tempting, and as I reached problems, I really wish I could just say "no one will notice if I take this out" etc, but I stuck with my goal, even if my lack of skills does not show a perfect 2D to 3D character transition.
Model 1: Neku Sakuraba - The World Ends With You
I started off with Neku, paying attention to the fact that after 5 years of being a 2D sprite, and fans wanting a sequeal, his game never got one. However, Neku and his friends appear in the 3DS game Kingdom Hearts: Dream Drop Distance. His first 3D appearance, but his style had to resemble the Kingdom Hearts art style, which is hugely different to the thick bold lines and graffiti style art. So keeping a close eye on the concept art throughout the process, I modelled him hoping he'll look more like his 2D design, rather than a Kingdom Hearts character.
Modelling him was very time consuming, because I didn't want to make any mistakes. I was making different save copies just incase. I had to redo several things, for instance, his baggy shorts I redid around 4 times, until I was happy with how they looked. Modelling certain parts then merging them was quite hard for me too; eg connecting arm to torso.
Modelling him was very time consuming, because I didn't want to make any mistakes. I was making different save copies just incase. I had to redo several things, for instance, his baggy shorts I redid around 4 times, until I was happy with how they looked. Modelling certain parts then merging them was quite hard for me too; eg connecting arm to torso.
The face is my least favourite part. I spent alot of time creating a suitable planner map of a face for Neku, but I only made one plane (front). Because of that, I didn't know how to do the sides, and I feel his face is a bit flat, or chubby cheeks like a hamster. It's an area I'd definitely go back to fix.
His hair was hardest to UV map, but surprisingly, not too struggling to model. Cutting appropriate UV's in the hair was quite difficult though. I could have hidden seams abit better.
I hate drawing and modelling hands, so I was lucky enough to get the help of Mike N and with help from Digital Tutors, now learnt it's easiest for me to extrude from knuckles. :) I also got to use the relax/pinch/pull tool for the first, how handy.
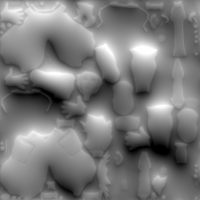
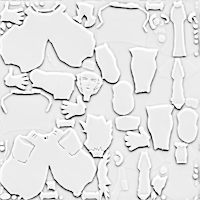
I'm actually a keen texture-er, and I'm starting to think of it as a career choice...in any chance, I UV'd the character and painted on top in Photoshop.
I'm actually a keen texture-er, and I'm starting to think of it as a career choice...in any chance, I UV'd the character and painted on top in Photoshop.
Neku is shown stationary, but he CAN move and he is ready to be implemented into a game. He's gone through the free rigging website Mixamo which brings models to life. Neku's movements were perfect, minus his arms. Some deformities appear when he bends them. This leaves me to think I didn't put in enough edge loops around the elbow, and/or I've modelled the elbows wrong.
I can't upload or submit the Mixamo video because of it's format. My second model doesn't have legs and Mixamo rejected the model because it couldn't understand it.
Model 2: Phoenix Wright - Ace Attorney
I stopped in late December with my first model because I couldn't wait to start my next one. I've already discussed how I modelled Phoenix already, so I'll keep this very short with what I wish I could have done/might go back to do....
- His textures; I put alooot of work into his colours, but I'm still really inexperienced at 3D painting. As a result, I've found out, apply the colours onto the skin twice has dark/light, so they really make an impact. Also, dark green is much better than anything, and I'll never use brown as a 'dark shade' ever again.
- His hands. Compared to the rest of the model, they're incredibly undetailed/low poly. Even my Neku has fingernails.
- His forehead/hair-line. It's slightly different in the 2D, but I couldn't replicate it sadly...My model looked like it had an afro.
- Eye sockets. I did the same for Neku....both my models are wearing black eyeliner.
- His chin. Probably my least favourite part of his model. His chin looks chunky from certain angles. Maybe it was too low poly. I think it detracts from the model/character, because the character actually has a different jaw line.
- My character looks stupid front on. Yes!! I think this might be a good thing. I've modelled Phoenix mostly from the side, so he has a strong side profile. But if the real developers of 3D Phoenix Wright (Capcom) really needed 3 different character models (one specifically to only be seen from the side, because he looks goofy front-on), then maybe I've done alright. It might also be that Phoenix Wright is like Disney's Mickey, in that it can't be translated properly into 3D, so tricks/shortcuts must be taken (such as 3 different character models.)
- I loved texturing him. Used many new softwares looking at cool maps (and not using them). Finding out how different colouring or 3D instead of 2D was cool, but as mentioned before, skin could have been better.
So that's the end of my first semester and Low Poly Modelling. I'm glad I choose it, I'll stick with 3D. I've already started a new character. One that I designed, this time. :) Thank you for following my blog.
- Ceren


